Members
https://owlfaceid.nanqing.cloud/settings/teams
Overview
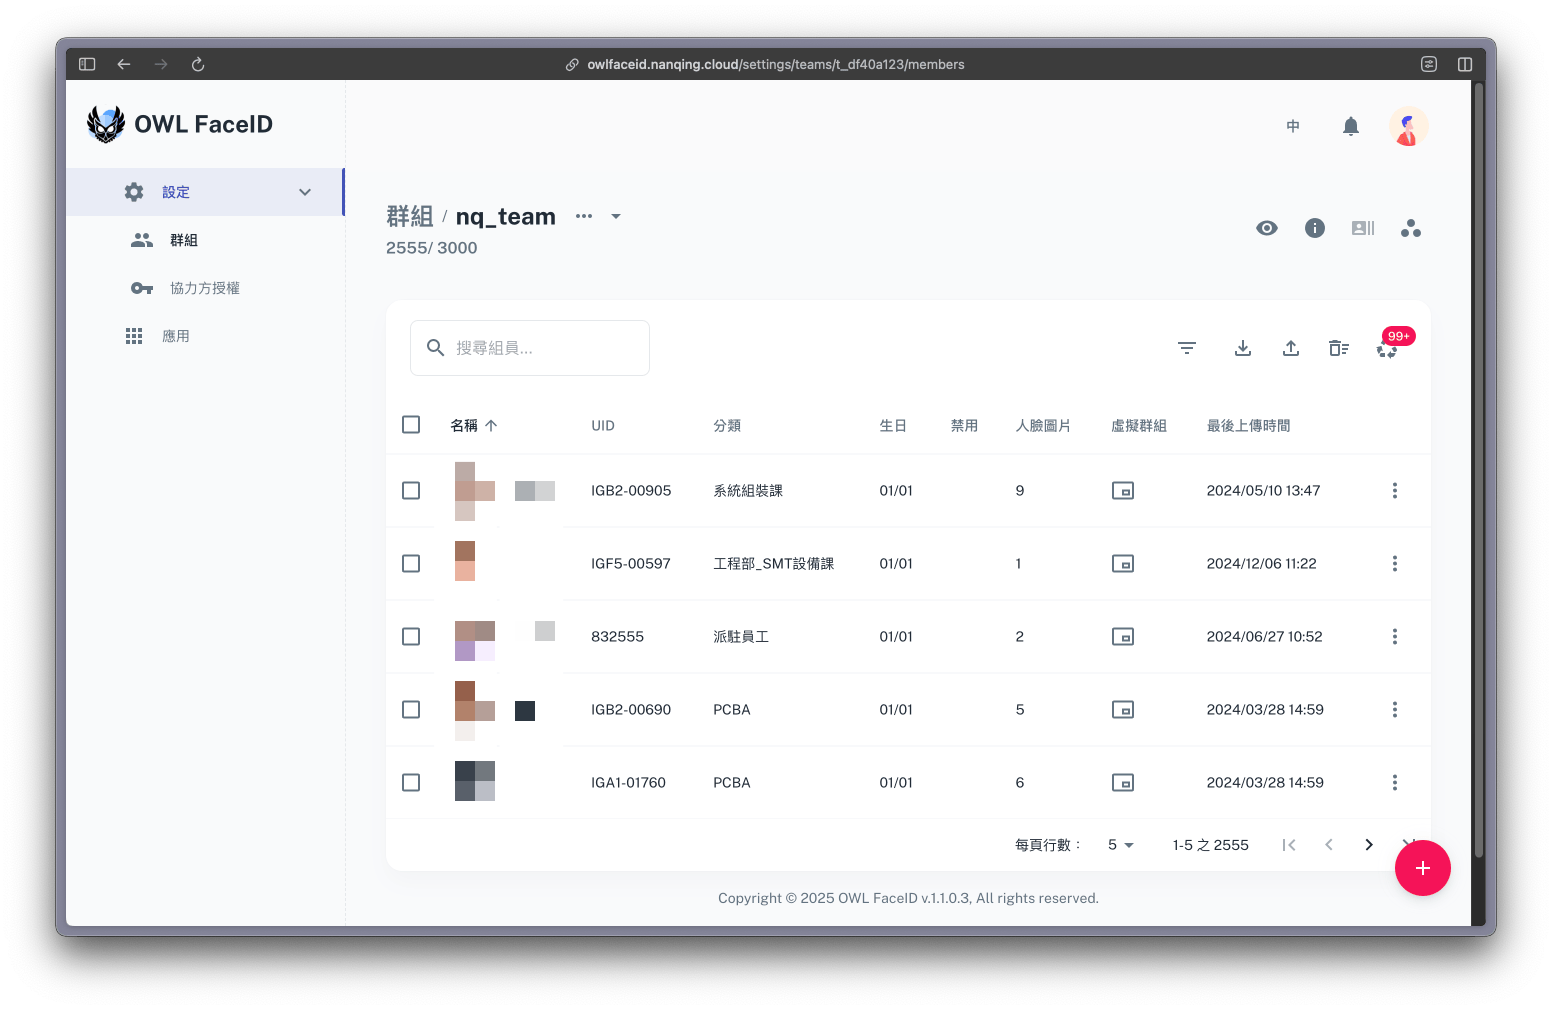
The Members page allows administrators to manage team members, their face data, and associated virtual teams. The page displays the current team capacity and provides comprehensive member management tools.
Note: The team capacity, which is based on the purchased license. If the capacity is not enough, users can contact the company to extend it.
Functions

- Testing: Upload images to find matching results in the database
- Model Info: View latest training information
- Training: Initiate model training using current member data, if red dot is displayed, the model is outdated
- Types: Configure and manage member type groupings
Member Management Tools

-
Search and Filters
- Search field supports queries by UID or name
- Filter button allows filtering members by type
-
Bulk Operations
- Export to Excel (.xlsx) or raw data (.csv)
- Import
- Batch upload members using provided template
- Batch upload member face pictures
-
Batch Delete
Remove multiple members using a template, the deleted members are moved to trash initially
-
Trash Management
- Access deleted members via the trashcan icon.
- Restore or permanently delete members.
- Temporarily store accidentally deleted members.
Steps to Add Members
https://owlfaceid.nanqing.cloud/settings/teams
- Select a team and click the row to enter members page.
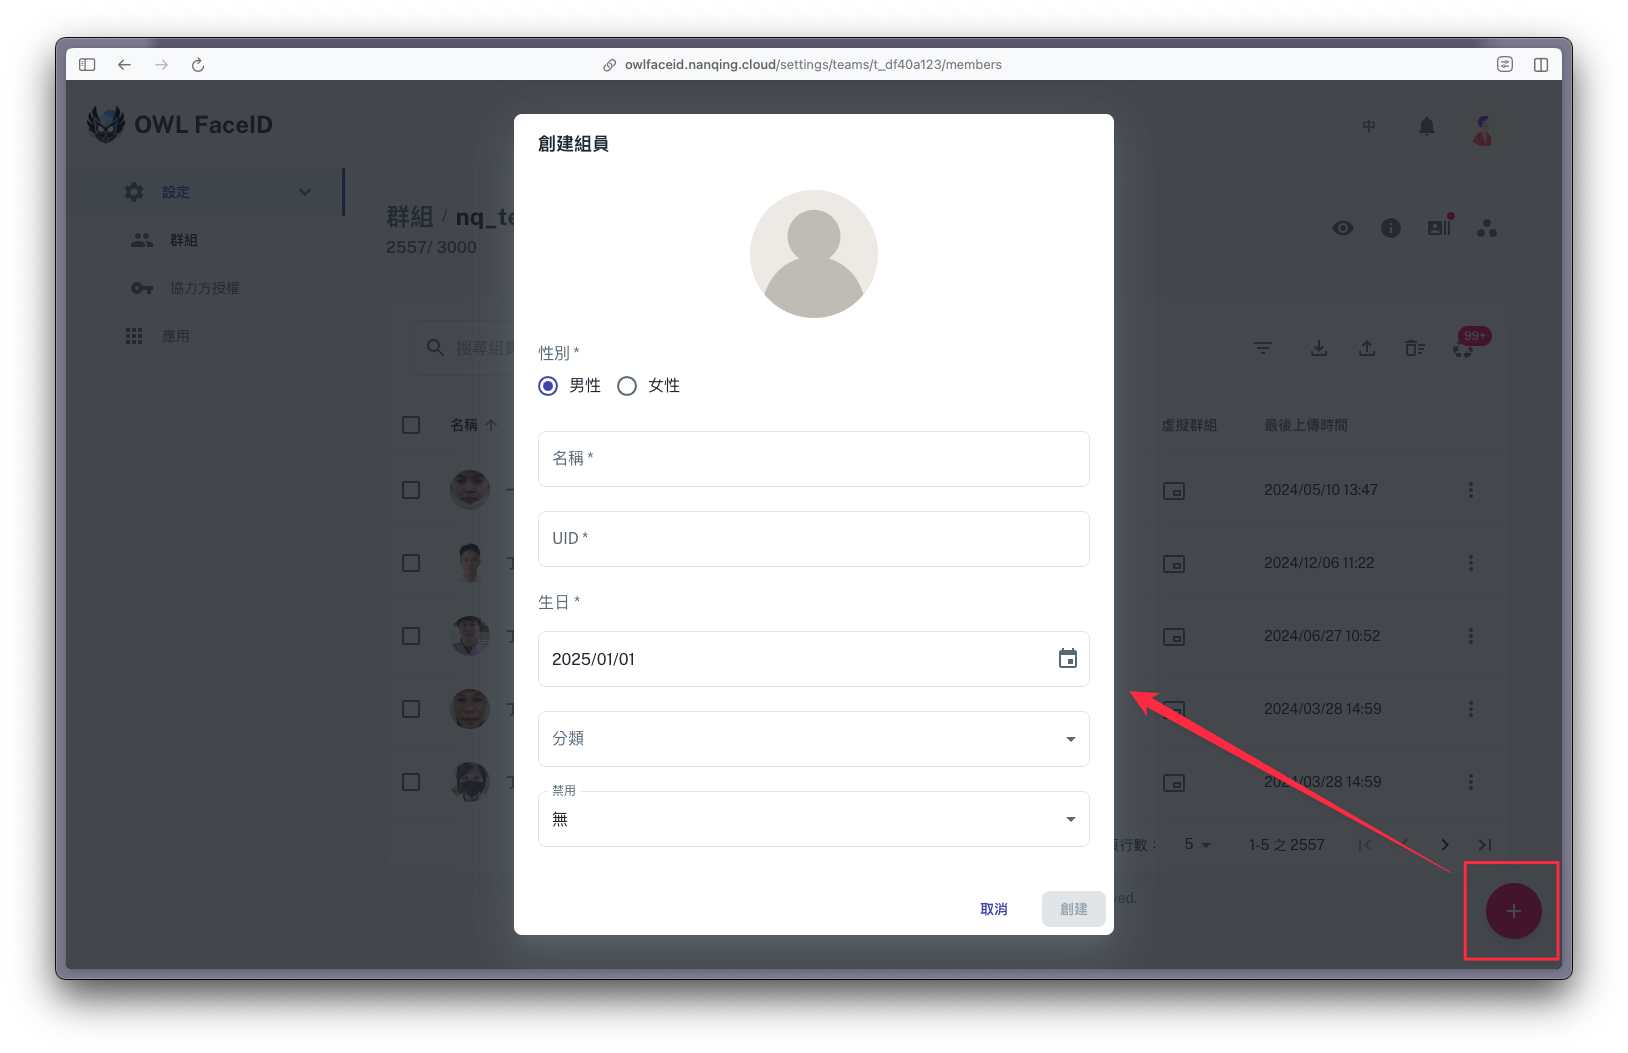
- Click the + icon to open member form.
- Upload member's avatar and fill in member details.
Managing a Member
https://owlfaceid.nanqing.cloud/settings/teams
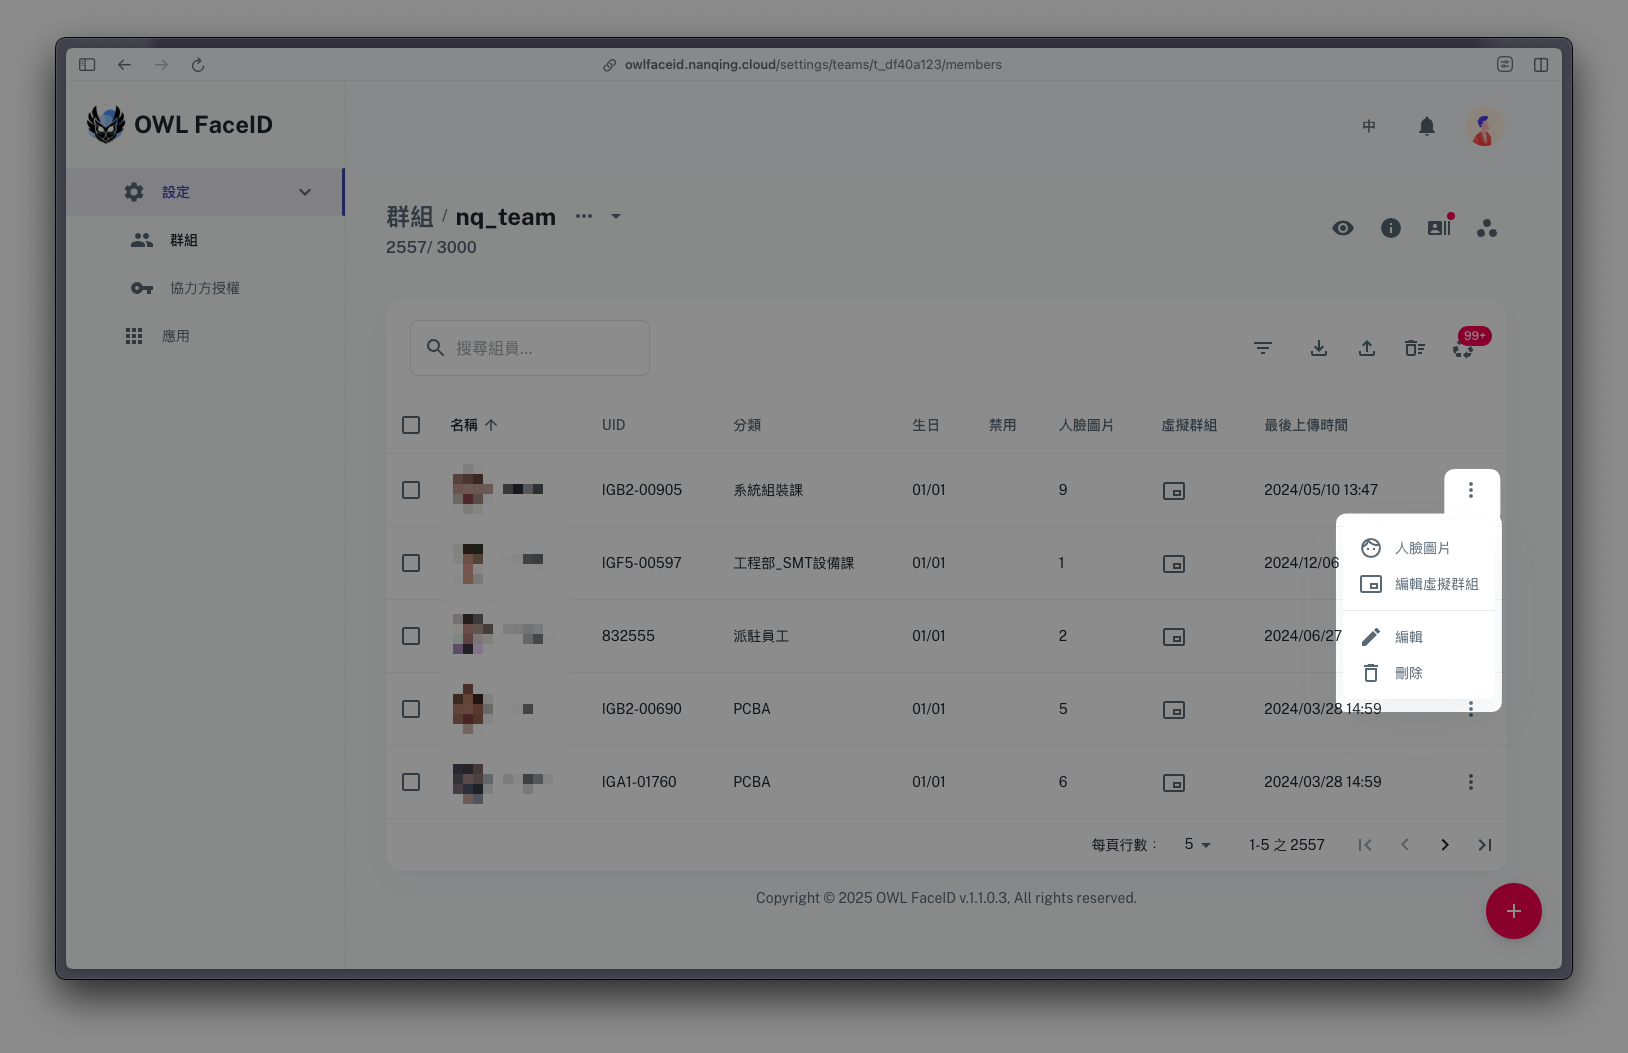
- Click the three-dot menu next to a member to access the following options:
- Face pictures: Manage the face pictures associated with the member.
- Edit virtual team: Manage the virtual teams associated with the member.
- Edit: Modify the member details.
- Delete: Remove the member to trashcan.
Uploading face pictures
- Click Face pictures in the menu to open the face pictures dialog.
https://owlfaceid.nanqing.cloud/settings/teams
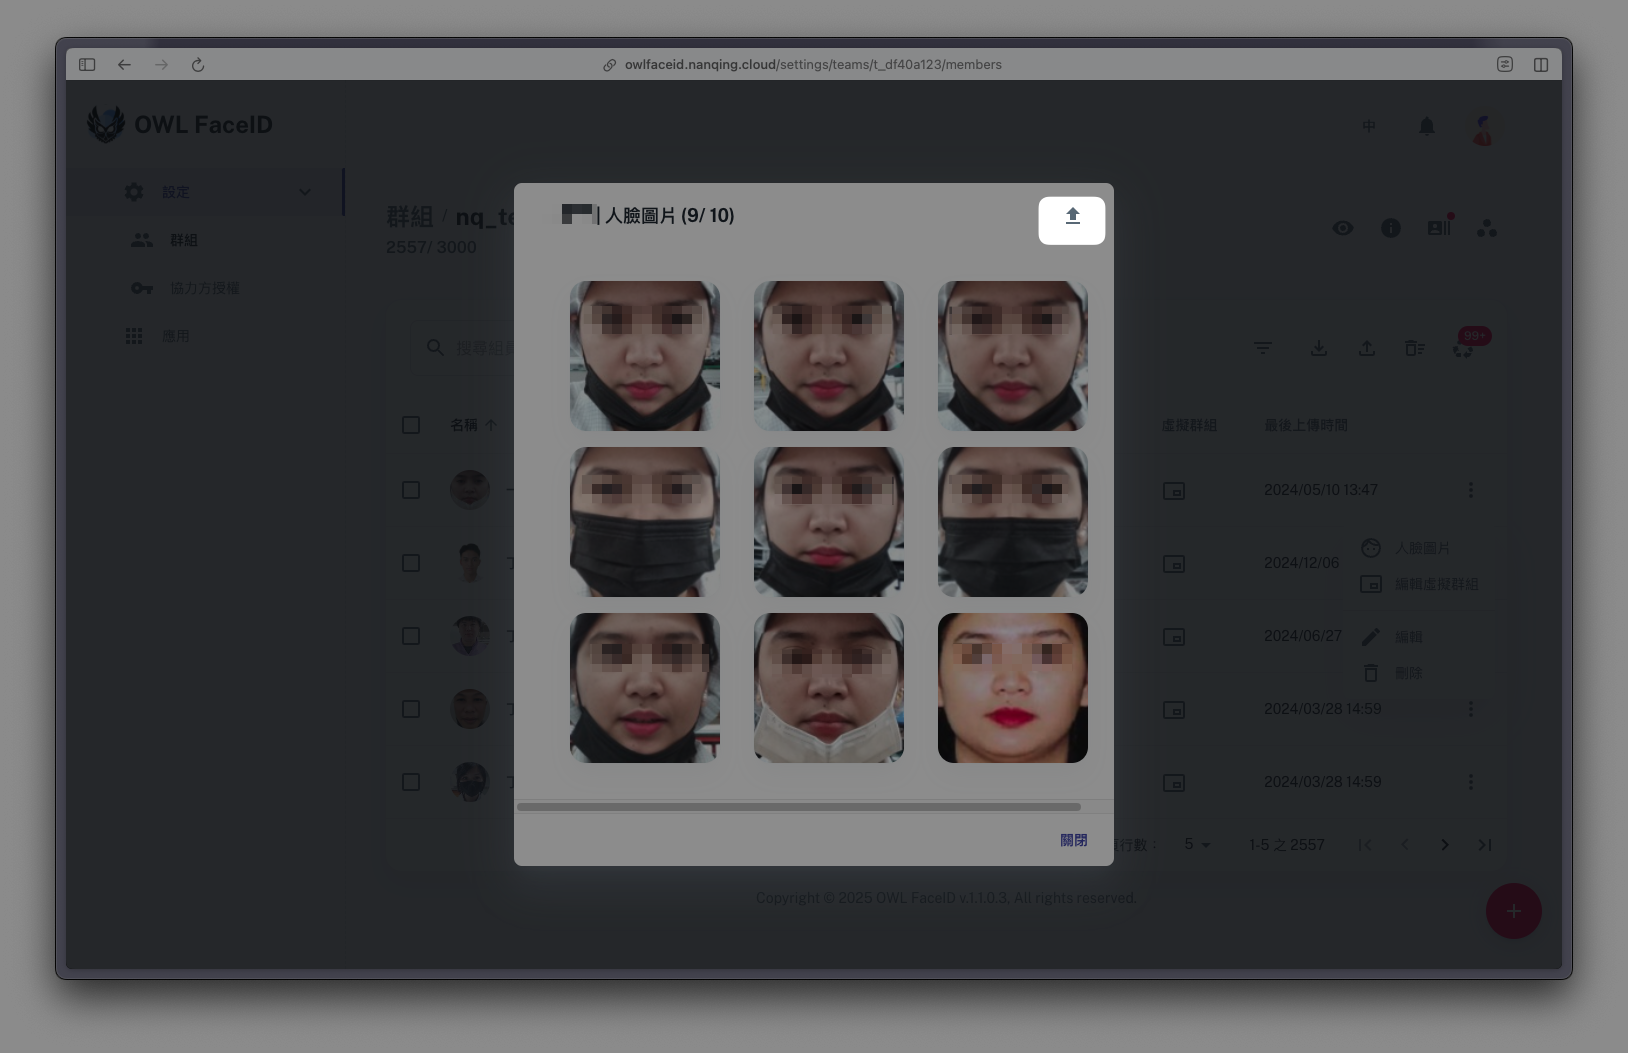
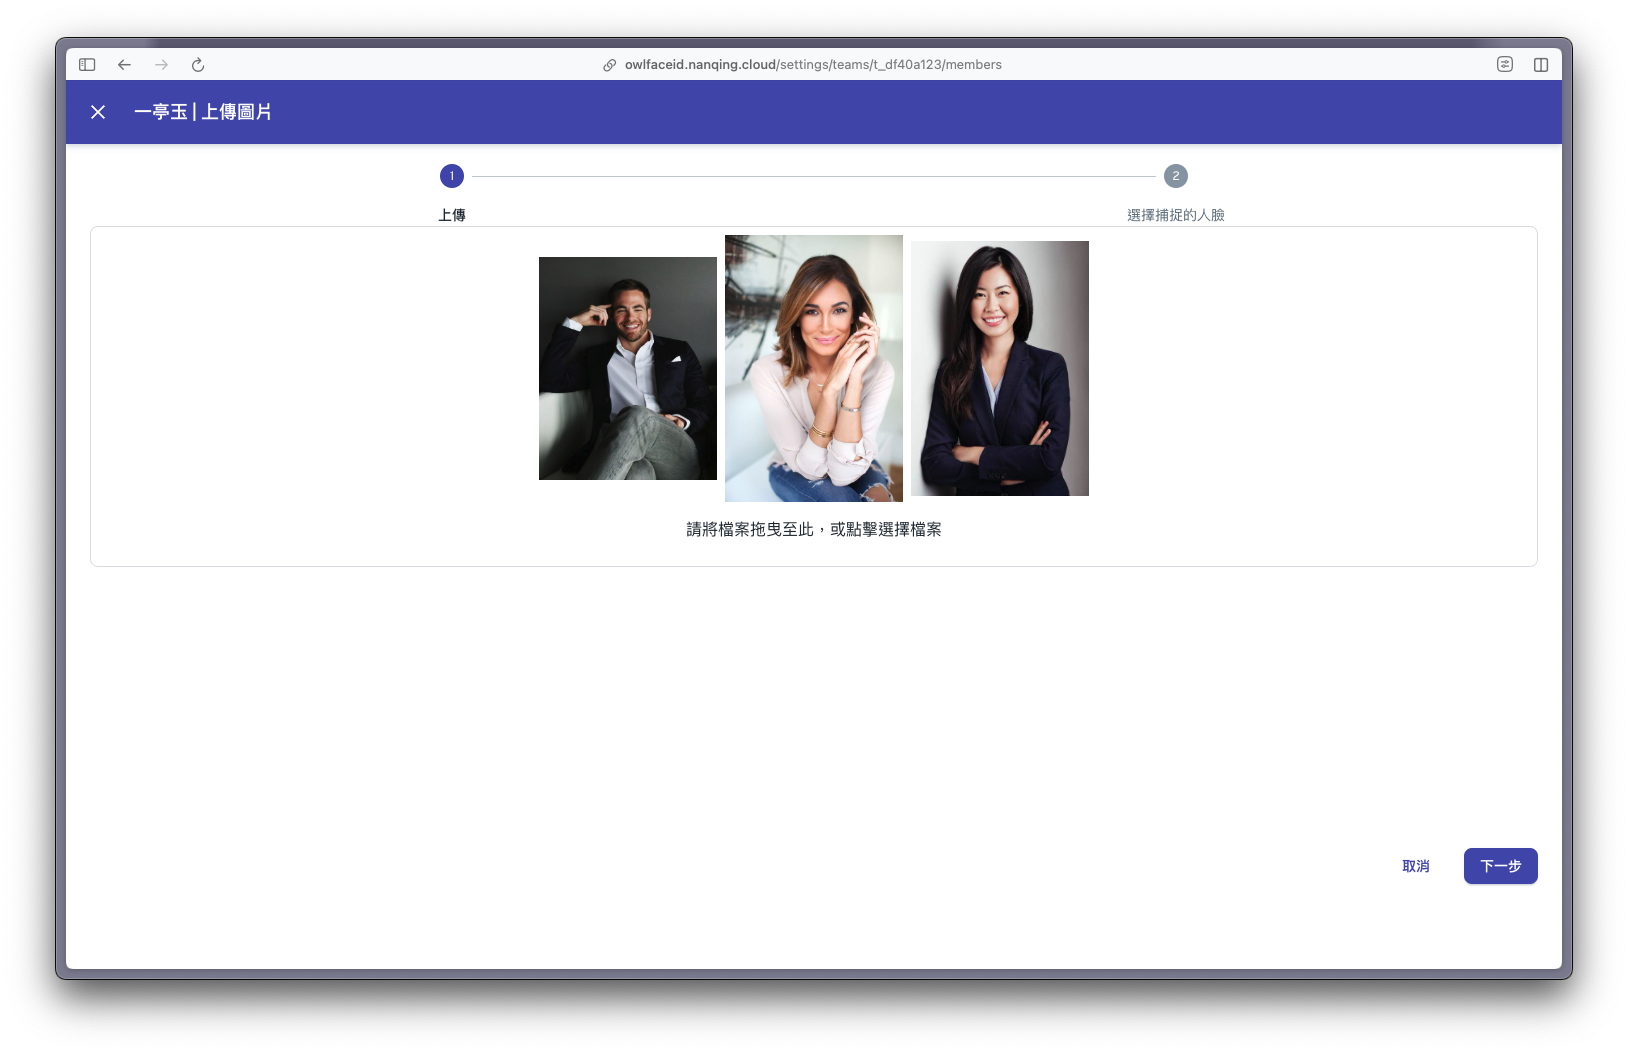
- Click Upload pictures in the up-right corner of the dialog.
- Click / drag and drop images in the dialog to upload images
- 🚨 Ensure photos meet requirements:
- JPG format.
- Resolution between 300x300 and 5000x5000.
https://owlfaceid.nanqing.cloud/settings/teams
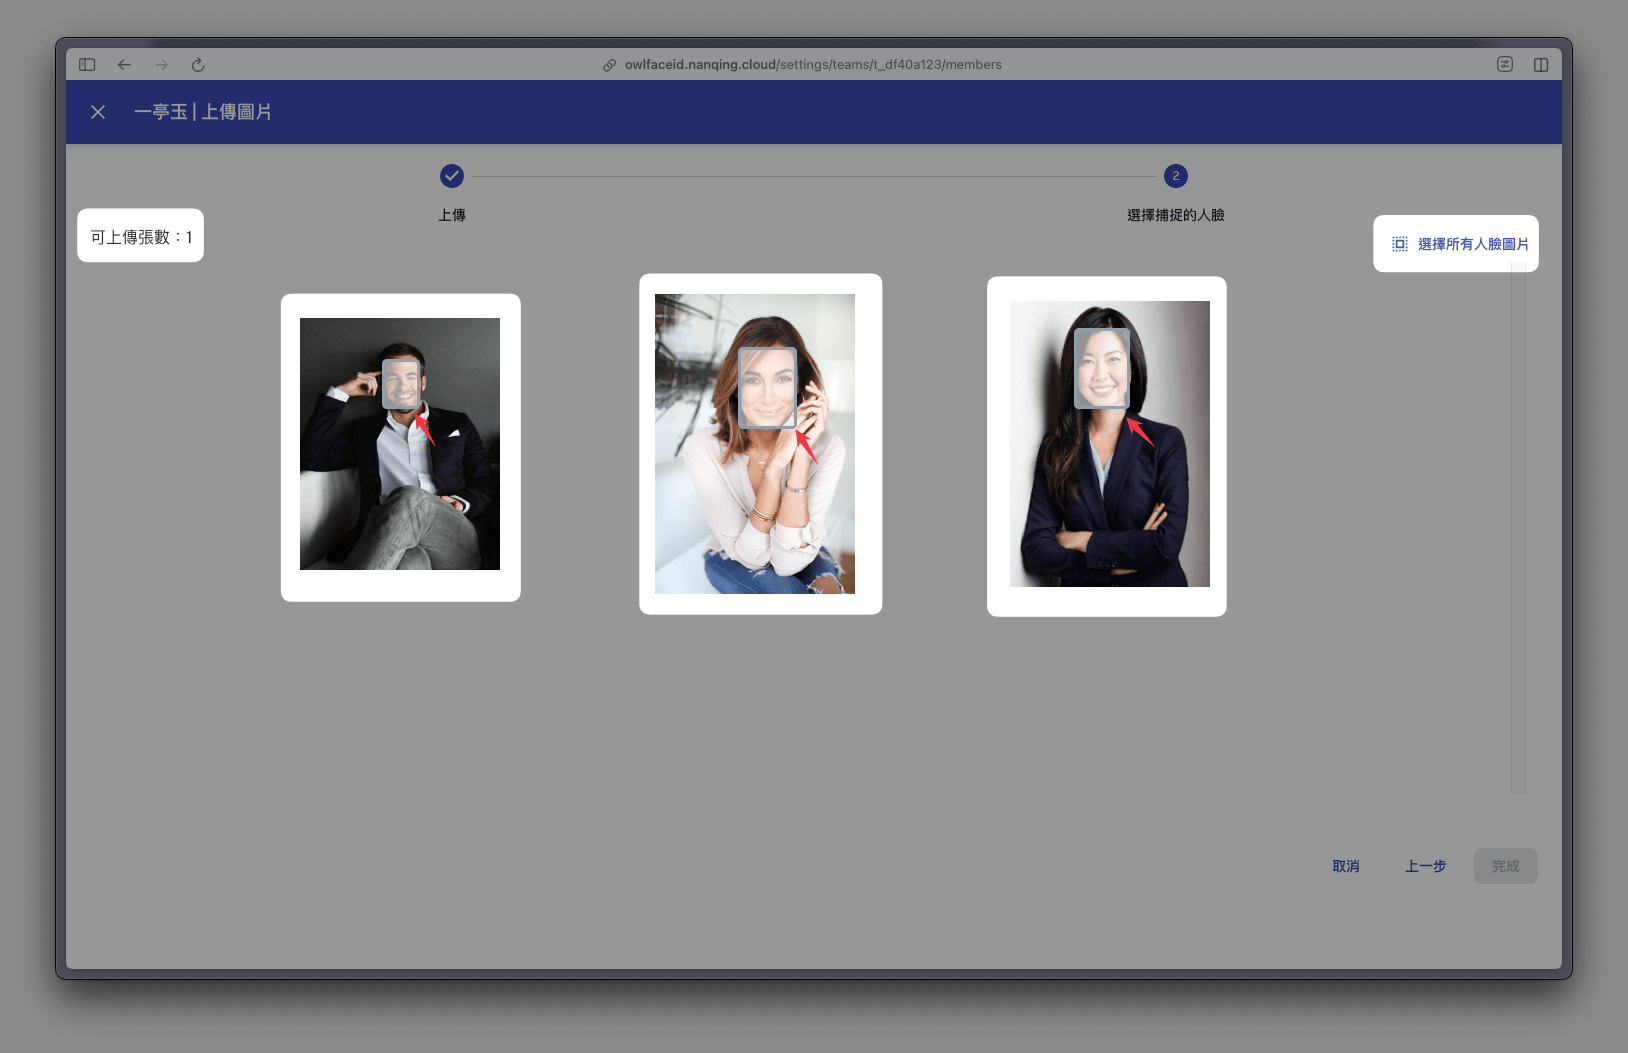
- Click Next to next step, the system auto-detects pictures and filters non-compliant pictures. After detection, select the correct face area / select all faces and click Finish to upload faces.
Note: The face capacity, which is based on the purchased license. If the capacity is not enough, users can contact the company to extend it.
https://owlfaceid.nanqing.cloud/settings/teams
Training and Testing Models
Training
- Go to the member list and click the Training icon.
- Wait for the training to complete before initiating new sessions.
Testing
https://owlfaceid.nanqing.cloud/settings/teams
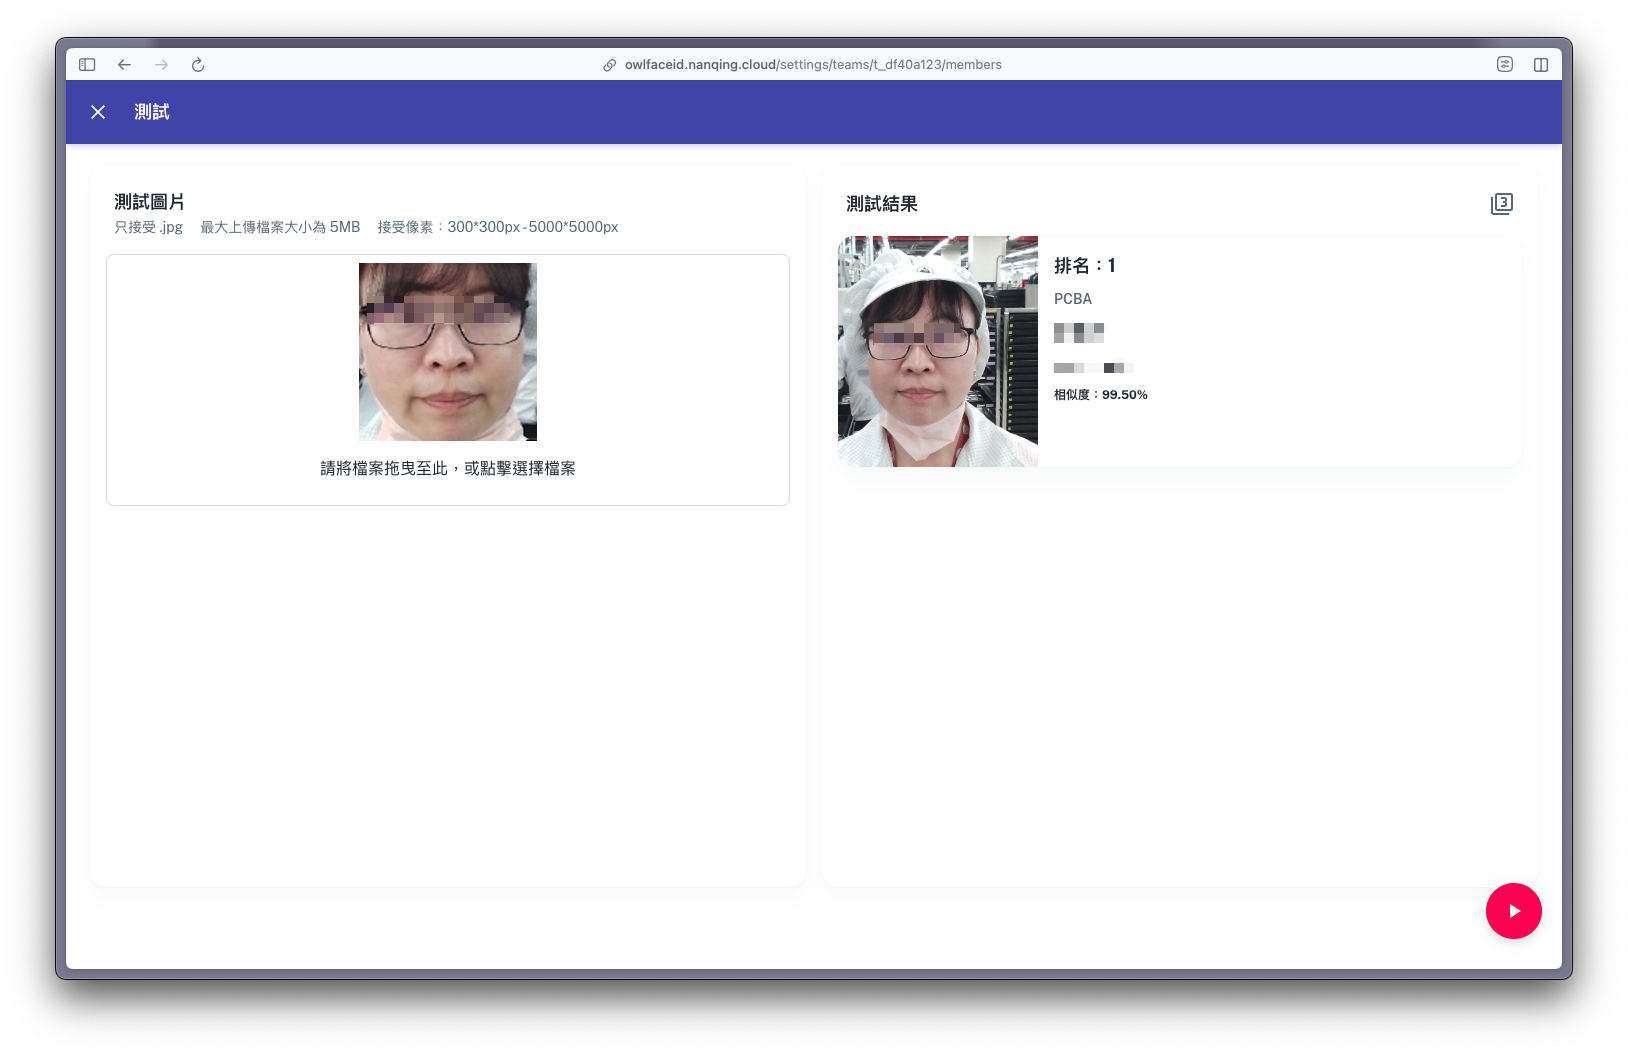
- Click the Testing icon for the active team.
- Upload photos for testing.